Troubleshooting Tule ET Sensor
The two most common reasons behind missing irrigation data are:
The pressure switch is disconnected.
The field’s irrigation system has low water pressure.
If you have a missed irrigation:
- Ensure that the sensor is installed; if you removed it during harvest, make sure that it has been reinstalled.
- Physically evaluate the sensor for damage.
- If the sensor is installed and there is no apparent damage check these things please:
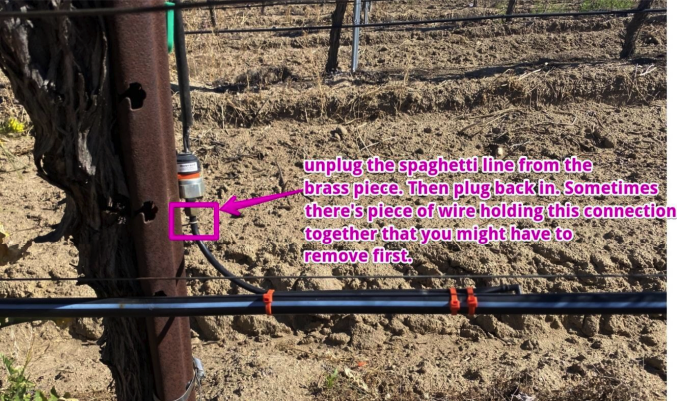
- Check the pressure switch connections: The pressure switch connects to the drip hose via a spaghetti tube. Check the tube connections. There is an electrical cord that runs from the pressure switch via a barrel connector to the bottom of the Tule sensor box. If anything is disconnected, please reconnect. Tighten the barrel connector if it’s loose.
- Check the water pressure. If it is plugged in, can you please turn on the irrigation and then check the flow at the sensor? It is important that you check the water pressure while the field is being irrigated during a production irrigation event (i.e., if your team normally opens valves to three sections of the field when they irrigate, then check the water pressure while all three sections are being irrigated). Disconnect the spaghetti tube from the pressure switch. There should be a steady stream of water flowing out of the spaghetti tube. Connect a pressure gauge into the end of the spaghetti tube. The pressure switch is activated at 5 PSI. If the pressure gauge reads less than 5 PSI, the water pressure is too low to activate the pressure switch (and less pressure than required for drip emitters).
- Email support@cropx.com with pictures and/or notes to help resolve the issue.